A Scary but true story with a happy ending

There are pilots, and those who simply love flight. In this blog we discuss learning to fly, airplanes & products, destinations, flight instruction tips, log stories, and 'flyosophy' the philosophy of flight. Becoming a pilot or accompanying a pilot are two worthy activities. May you enjoy the journey! ~ Rob Bremmer

Posted by
Rob Bremmer
at
6/04/2009 09:19:00 AM
0
comments
Labels: FAA checkride, flying with hood, landing gear malfunction, situational awareness
Posted by
Rob Bremmer
at
3/25/2009 03:37:00 PM
1 comments
Labels: A pilot's story, Piper Arrow, Rico Sharqawi, Watsonville CA, Will Hawkins

Posted by
Rob Bremmer
at
1/20/2009 05:19:00 PM
0
comments
Labels: bald eagle, bald eagle seen from air, hawk talons, Lenhart, Mulino, perched bald eagle, red tailed hawk, red tailed hawks fighting in midair, short field, soft field, Vx, Vy, Willamette Valley
What if there was a store where you could buy parts for your antique aircraft - you know, the one that went off the assembly line over 50 years ago?
Well, there is! and it is called Aircraft Spruce. I never knew they existed until I bought an Aeronca Chief (11AC) in the mid eighties, and decided to install compression tailwheel springs. There is something a little bit like being a kid at Christmas when your package arrives. You may not know this, but as an owner/operator of an official antique aircraft you can make arrangements for supervision with an A&P, which allows you to do the installation work of non-aerodynamic parts (such as tailwheel springs) and then he can certify the work and log the maintenance after he inspects it. It's a good way to really get to know your aircraft and the inspection process too.
Onwards & Upwards!
Rob Bremmer
Helping a struggling student obtain a goal, or helping someone awaken to their potential, is always a good thing! Here's how you can help.
I've set up a donation link. Donate anything, even a dollar. When a significant amount is reached, and I figure $1,000 is a reasonable threshold, I'll make a donation to help some student obtain a flying goal.
I am motivated when I think of how hard it was for me to obtain flight hours, equipment, books, training - every aspect of flying had a cost and it was not easy to do it. It took me a long time, and I had no assistance. There were people I met who could've have benefited even more than I, from assistance and I'd like to help some of those students. I'd also like to help awaken young people from difficult backgrounds to the wonders of flight, and the experience of learning to control an aircraft, and observing your world from a new perspective.
While the account is growing, I'll be looking for the best way to help a student or young person, and I am open to suggestions from you, the reader. I am particularly looking forward to reporting the results - how we have together actually made a difference. Let's see what type of a difference we can make!
Onwards & Upwards,
Rob Bremmer
Posted by
Rob Bremmer
at
1/04/2009 04:10:00 PM
1 comments
Labels: Contribute to help underprivileged students, help students achieve a professional career, help students learn to fly, student flight fund
First, look at the springs. The illustration shows compression springs installed, and typical tension springs not installed but next to the compression springs for comparison. You should use compression springs, for several reasons. Compression springs in their unactivated state, or when the rudder is neutral, are not applying any force on the tailwheel. They only apply force when the rudder is moved left or right, and then only on the side of desired movement. Tension springs, on the other hand, apply tension all the time, so if one breaks, (and tension springs are typically more inclined to occasionally break) the broken side whips free and the tension on the other side pulls the tailwheel to the side. Not good at critical points of a landing or while taxiing! Compression springs also give better handling. When you are taxiing with a tension spring, and you push rudder, it stretches the spring and the wheel thinks about moving then responds, in a springy sort of way. When you do the same with compression springs, the response is tight and immediate, which means as pilot and operator, you get immediate feedback as to whether you need more or less rudder input; you don't have to wait and see what will happen. Also, compression springs are typically thicker. Thicker metal outlasts thinner metal every time.
Posted by
Rob Bremmer
at
1/04/2009 09:17:00 AM
0
comments
Labels: compression springs, how to fly tailwheel aircraft, safely flying tailwheels, tailwheel, tailwheel assembly, tailwheel landing, tailwheel takeoff, tailwheel taxi, tailwheels
It's New Year's Eve!
Let's put down serious talk about flight, reminiscing and everything else and play a few games. I've embedded a fun little game gadget at the bottom of the blog, and here are a few links to other online flying games.
Airfox Squadron Angel A quick fun game of Helicopter, A site for Many free flying games A site to Demo games before purchase and this site is good for kids of all ages. Enjoy!
Onwards & Upwards!
Rob Bremmer
Posted by
Rob Bremmer
at
12/31/2008 08:21:00 AM
0
comments
Labels: airfox, flying games for kids, Free flying games, Helicopter, play flying games here, Squadron Angel
Posted by
Rob Bremmer
at
12/30/2008 05:13:00 PM
0
comments
Labels: airport stories, airshow, bullet proof podium, president bush, secret service
Small aircraft can be greener, more eco-friendly and sustainable than cars! Here’s the argument for the case.
Just out of curiosity, why don’t more environmentalists support flying? Especially flying small general aviation planes. Think about it. A four seat aircraft weighs less than a four seat car and less materials are used. An aircraft going from point A to B will get there faster, therefore the engine and systems run for less time than a car over the same distance. While we are on point A and B, a car travels a squiggly circuitous route to get from A to B while a plane can fly relatively straight, so the plane travels less distance to get there. Airplanes travel in three dimensions while a car travels in two, so aircraft can distribute congestion over altitude. Let’s compare fuel consumption over the trip and see how that works out. We’ll compare and contrast a car and a plane over two distances, 100 miles and 1000 miles.
Plane:
Miles traveled : 100 1000
Speed: 120mph 120mph
Time traveled: 50min (.833h) 8h30min (8.5h)
Fuel consumption @ 6gph: 5gal 50 gal
Car:
Miles traveled : 100 1000
Speed: 65mph 65mph
Time traveled: 1h32min (1.53h) 15h20min (15.38h)
Fuel consumption @ 20mpg: 5gal 50 gal
As you can see, the fuel consumption is the same yet the time traveled is much less for the aircraft. There are other benefits too; including wear and tear on the two vehicles, which will be less for the aircraft over the same distance. There is just less friction in play to wear down the aircraft than there is friction wearing down the ground vehicle.
Now the naysayers can quibble over all this. Some will say the fuel consumption is off, and will create a scenario to prove that. Others will say the cost of production is off, or there are fewer landing places which is true, but this is more a factor of aircraft design and zoning rather than anything else. Yet any argument the naysayers construct will be dwarfed by the one, elephant-sized issue, always overlooked, which is in the favor of the aircraft; the car needs 1,000 miles of highway built and maintained while the airplane needs only 1 mile for the same 1,000 mile flight, with a half mile for take-off and a half mile for the landing.
Let’s just say, conservatively, that it costs $10,000 dollars per mile of runway or finished highway. So our mile of runway costs $10,000 while the highway would cost $10,000,000. And this does not even include the environmental destruction which occurs with those extra 999 miles of highway!
So why aren’t more people flying and saving time and the environment? That’s a good question! In today’s environment; costs, legal, cultural and bureaucratic blocks, thwart progress and growth, but the good news is none of these are insurmountable.
If you love aviation and you care about the environment, we ought to start advancing discussion on this and similar arguments. It is possible, with design enhancements within existing technology to make aircraft more flexible for use. Zoning changes can make airports more practical to build and maintain. Improved aircraft design using known technology and design can improve aircraft performance for airport operations. Training changes can make pilot proficiency better, marketing can increase the value of general aviation in the public eye and political strength can help fight for better utilization of general aviation. If you are interested, you can help start the dialog needed to begin making the changes.
onwards and upwards!
Rob Bremmer
Posted by
Rob Bremmer
at
9/10/2008 12:19:00 AM
0
comments
Labels: airplanes cheaper than cars, envirnmentallyfriendly small planes, gren airplanes, save the environment by flying small planes
This is a response to the comments posted earlier. It seems there is a lot of interest in this subject! Besides setting a low ASA, (which reduces the graininess) you want to get the best f stop at the highest shutter speed. I find any shutter speed ove 250th of a second guarantees I'll get rid of any vibrations (higher speeds are better in turbulence) and then I set the f stop for the smallest aperture possible without driving the shutter speed lower. As for focus, my camera, a mid - level Canon digital SLR style camera, will usually work fine on auto focus, but if it does not I set it to manual and set it to infinity.Hopefully the sun angle is low, like you would get from sunrise to around 10 am or 3 pm to sunset. The lower the angle, the more dramatic the shot as their will be more color possibilities and better contrast from shadow detail. Alas, we cannot always choose our flight for the sun angle!Your goal is to get the target image in or near the center of the image, with no parts of the airplane in sight. Try to shoot through clear sections of class if your window is smudgy, and if it is smudgy on the inside, you may be able to clean it a bit with a blanket or cloth. Yet capturing the image i just half the story. Think of it as capturing the 'raw data.' When you bring the image up on you computer, it will typically have a bluish sheen from reflectivity and shooting through the Plexiglas. If the details on the ground are strong enough you can significantly or even completely 'tune out' this image problem by increasing the brightness and contrast in even the most basic photo editor. The Google Picasa editor (free download) can do this for you, or you can use the Microsoft Photo edit suite, which I also use. The three areas I usually use to tweak a photo and dial out the glare are contrast, brightness and color temperature. Sometimes I sharpen the image with focus, if necessary. I hope that helps! If anyone gets an interesting shot they would like to share, email me at rob.bremmer@gmail.com and I'll post your photo and give you photo credits.
onwards and upwards!
Rob Bremmer
Posted by
Rob Bremmer
at
9/10/2008 12:04:00 AM
0
comments
Labels: aerial photos editing aerials, making better aerial photos


Aerials on a Friday afternoon in summer are good ~ Aerials of an active volcano are better!
Part of the fun of taking aerial photographs is introducing a friend to the fun of it. Recently I flew a friend around Mt. St. Helens. These photos were taken by Michael R, his first aerial photos, taken from a C-172 open window. The contrast was increased slightly and brightness decreased slightly in Photo edit suite.
The flight was an hour and a half round trip, with 25 minutes lingering on-station, circling the remnant mountain top. The most dramatic images were shooting towards the sun with the dark foreground and colorful background and shooting east, with the wall of the crater illuminated by the setting sun and revealing the mineral complexities on it's slope, along with some ash and sheets of ice. There was no turbulence during the flight, which made for a more stable shooting platform.
onwards and upwards!
Rob Bremmer
Posted by
Rob Bremmer
at
8/05/2008 12:44:00 AM
0
comments
Labels: aerial photo of mt. st. helens, inside the volcanic crater, volcanic steam and ash, volcano
How to make aerial photos from the window of an airliner 'more better.'
This is a response to the comments posted earlier. It seems there is a lot of interest in this subject! Besides setting a low ASA, (which reduces the graininess) you want to get the best f stop at the highest shutter speed. I find any shutter speed over 250th of a second guarantees I'll get rid of any vibrations (higher speeds are better in turbulence) and then I set the f stop for the smallest aperture possible without driving the shutter speed lower. As for focus, my camera, a mid - level Canon digital SLR style camera, will usually work fine on auto focus, but if it does not I set it to manual and set it to infinity.Hopefully the sun angle is low, like you would get from sunrise to around 10 am or 3 pm to sunset. The lower the angle, the more dramatic the shot as their will be more color possibilities and better contrast from shadow detail. Alas, we cannot always choose our flight for the sun angle!Your goal is to get the target image in or near the center of the image, with no parts of the airplane in sight. Try to shoot through clear sections of class if your window is smudgy, and if it is smudgy on the inside, you may be able to clean it a bit with a blanket or cloth. Yet capturing the image i just half the story. Think of it as capturing the 'raw data.' When you bring the image up on you computer, it will typically have a bluish sheen from reflectivity and shooting through the Plexiglas. If the details on the ground are strong enough you can significantly or even completley 'tune out' this image problem by increasing the brightness and contrast in even the most basic photo editor. The Google Picasa editor (free download) can do this for you, or you can use the Microsoft Photo edit suite, which I also use. The three ares I usually use to tweak a photo and dial out the glare are contrast, brightness and color temperature. Sometimes I sharpen the image with focus, if necessary. I hope that helps! If anyone gets an interesting shot they would like to share, email me at rob.bremmer@gmail.com and I'll post your photo an give you photo credits. I hope ths helps those who are interested.
onwards and upwards!
Rob Bremmer
Posted by
Rob Bremmer
at
7/30/2008 07:06:00 PM
0
comments
Labels: aerial photos from jets, editing techniques for aerial photos, extra details on taking aerial photos from airliner windows

You might think you need a small plane or a big budget to take interesting aerial photographs but that isn't true! Photos taken from the seat of any airliner, with a little planning, can yield spectacular results.
These photos of Crater Lake were taken from a right-side passenger window seat in front of the wing of a Horizon Air RJ Regional Jet on a flight from Southern California to the Pacific Northwest. It does require a little planning ahead to capture such shots, for example, having a window seat is very helpful, and a clean window is important too! You also want to sit in front of the wing, as far in front as possible to maximize opportunities to see the ground. Behind the wing can be interesting, but the wing will limit your view forward and if the aircraft has wing mounted engines the thrust and exhaust gases will distort the air, ruining a clean view of any object on the ground. Sitting over the wing renders ground shots useless, but interesting cloud shots can still be obtained!
Any digital camera will work, but the better ones allow you to set a lower ASA number and maximize the quality of the photo in terms of photo size which equates to more megabytes per image. A zoom lens is helpful but not necessary. Sometimes a wide angle will give more interesting shots encompassing sky and land, yet a telephoto, while allowing the appearance of closeups, can highlight haze in the atmosphere and is more inclined to pick up shaky vibrations which blur the shot.
Don't conserve shots! Shoot like crazy; it's digital, so after the opportunity has passed by the window, you can edit away the weaker images. Remember you are traveling at over 200 miles per hour so when you see look as far ahead of the plane as you can and when you see something that looks interesting get your camera ready and start taking pictures!
I could mention that while I was taking these images I was being served complimentary chilled northwest micro-brews, a unique and classy service on the last remaining civilized airline in the United States, but that would be an entirely different story!
onwards and upwards!
Rob Bremmer
Posted by
Rob Bremmer
at
7/28/2008 11:33:00 PM
2
comments
Labels: aerial photos for anyone, Crater Lake aerial photo, digial aerial photography, good photos from an airliner window seat, Horizon Air, Oregon natural monuments
I've added a small survey to uncover the predominant reason people don't fly as much as they could.Please take the survey, and check back later for the results.
onward and upward!
~ rob bremmer
Posted by
Rob Bremmer
at
7/18/2008 08:17:00 PM
1 comments
Labels: A survey on why to fly and why you don't fly more often. check aviation survey results often


As the old song suggests, the visual beauty of clouds may be appreciated from the top looking down as well as the more traditional bottom looking up. This post is in honor of John Day, a physicist who recently passed away, and spent his life studying clouds and promoting cloud watching. I feel certain he would have enjoyed flying, leaning out an open airplane window and taking photographs of clouds from the top to compliment the view from the ground.
I only just learned of Dr. Day and his work recently. He studied clouds, wrote about clouds and cloud physics, turned cloud photos into art and even got the US Postal service to put one of his cloud photos on a postage stamp.
Knowing this I am convinced I would have enjoyed talking to the man and I believe he would have enjoyed discussing and comparing images and stories about clouds. As a pilot, I've always watched clouds and whenever possible, taken photos from an airliner window as well as open cockpit and open window small planes. Clouds can be just as fascinating when viewed from the top looking down, as they can be from the bottom looking up!
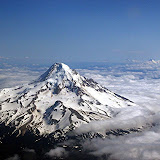
The three photos here are my favorite cloud images recently shot. The orange mammatus cloud shapes were at Sunriver after a thunderstorm. The striation lines of clouds cast interesting shadows over the Bitterroot mountain range while flying east, and Mount Hood makes an early summer roadblock for a mid-level line of stratus, forced to curve around the shape of the mountain.
You can view Dr. Day's images and read more about him and his work on his website, at www.cloudman.com.
onwards and upwards,
Rob Bremmer
7-4-08
America is unique in many ways and certainly one of the most special and precious is the freedom to fly. As I think back over the years of flying aircraft I can recall a few flights taken on the 4th of July and I can recall the surge of feeling which arises when flying and seeing fireworks displays. One memory stands clearer than all the others.
It was the mid 1980’s and I was flying from San Diego north through the LA basin. The plane was a Grumman Tiger, an AA-5B, an aircraft with exceptional visibility through the bubble windscreen and the side windows, despite the low wing which often can block a view. The day was warm and the departure from Gillespie field was just after sunset, which put us inside the Los Angeles basin well after dark. We were flying low and wide, to skirt the Class B Airspace (A TCA to those of you who flew with the older designations). Flying under the shoulder of a controlled airspace is best accomplished by charting a distant landmark and a nearer landmark that create a line clear of the controlled area, So that you can keep your eyes outside the cockpit and just concentrate on holding your altitude and enjoying the view as you stay on track on your courseline.
This technique frees you to keep a maximum lookout for other traffic, which is easier to see at night than in the daytime since you need only look for anti-collision, landing, and navigational lights. This also means your eyes are drawn quickly to assess moving lights, and on this evening, with clear nighttime air, fireworks displays popped out in stark contrast to the black hills to the east of the valley.
The effect of seeing the displays all around us, in front, to the rear quadrants and to the sides both near and far was inspirational. My passenger and I were Americans, flying an aircraft on our own, in free and clear skies and seeing the celebration of that national freedom surrounding us with dazzling and sparkling displays of lights, bursting and shimmering like rapidly blooming and fading flowers of brilliant light.
Soon we were through the valley and on into the darkness of the terrain enroute to San Luis Obispo. The radio chatter was nearly gone and the sights to look at were nearly non-existent, so much so we were using the instruments as much as outside reference to aid our VFR flight into the black night. Above us the stars filled the sky and my only thought for a while was the good fortune I held as pilot controlling an aircraft in flight.
The instrument panel glowed with a warm red light and the white wings caught the alternating flash of the anti-collision light from the top of the vertical stabilizer. A deep breath in and a long gentle exhale while I soaked in the scene around me. My wish was that others might be able to feel the sense of incredible satisfaction, joy and a calm resolute peace which comes at such a moment, a moment I am certain occurs more often for pilots than anyone else on earth.
onward & upwards!
r. bremmer
Posted by
Rob Bremmer
at
7/04/2008 07:39:00 PM
1 comments
Labels: flying on the 4th of July

Posted by
Rob Bremmer
at
3/11/2008 10:52:00 PM
0
comments
Labels: biplanes, canoes on the deschutes river, Destinations, jets, live airport webcam Review - Sunriver 2 of 2, soaring
Rotodyne - What an amazing aircraft!
You have to see this to believe it. If you know why it never achieved production, please tell us. If you think it should be resurrected, tell us that, too.
Click on the link, or cut and paste, to watch the video and listen to the narrator.
http://www.youtube.com/watch?v=y9633v6U0wo
Onwards and Upwards ~ rfb
Posted by
Rob Bremmer
at
11/15/2007 12:25:00 AM
0
comments
In the business world, there are so many TLA's (Three Letter Acronyms) it is hard to keep them straight. But in aviation they are an important part of your ADM (Aeronautical Decision Making) and fit into your CRM (Cockpit Resource Management). I've even invented a few. Here is one of my favorites!
Instrument flying, especially solo IFR, can be a handful. Every technique that reduces your workload and helps you maintain procedures is a good technique. From the IAF (Initial Approach Fix) inbound to a landing or a go around from an instrument approach, there are some specific elements which must occur every time. The acronym HALFDARTS (think of half a dart flying to the airport) can help you when entering your approach phase. They are in he order I like to pay attention to them. I find in practice this flows well.
H -
Heading. Heading is certainly the most critical; if you are not heading towards the next fix, or the OM (Outer Marker) everything else is a mot point and you may be rapidly flying into danger. Remember that heading is not course. Heading takes into consideration any WCA (Wind Correction Angle) necessary to maintain your desired courseline, which only becomes more critical as you approach your landing zone. Take a moment to think about what headings you'll use, maybe dial a heading into your VOR/OBS; double check the Heading on your Heading Indicator, and look over any headings you'll need through the rest of the approach and the missed approach too.
A -
Altitude. Just as with heading errors, altitude errors can get you quickly into trouble, though at least you'll be on the right heading, right? Set your altimeter to the airport altimeter setting, and commit to memory the altitudes for each phase of the approach, including MDA (Minimum Descent Altitude) or DH (Decision Height) if it is a precision approach, and be sure to include your missed approach altitudes as well.
L -
Lighting. Why worry about lighting now? Because at this stage of the approach you have the mental bandwidth to set up the cockpit lighting the way you'll have best visibility during the approach and still be able to see outside for approach lights at breakout, You'll have the time to think about and set landing lights, nav and recognition lights, and think about whether you want strobes on or not, since they can be disorientating in clouds. While you are thinking about lighting, what is your emergency lighting plan? A lighting emergency on final approach won't be so bad if you can quickly put your hand on your flashlight.
F -
Frequencies. Run through and set your frequencies. If you pre-set frequencies, do so. I like to have approach and tower on the number one comm radio and ATIS / ASOS and ground control on the number two comm, but that's just my preference. I also like to use all nav equipment I have on an actual approach, so each receiver will be turned in to an appropriate frequency. If I have a number two nav not in use I'll set i to the ILS or approach course as a back-up, and I'll pay attention to the audio, testing and setting each with appropriate squelch levels, and leaving he audio on the primary approach navaid up just loud enough to hear the morse code identifier during the approach. No audible identifier, no reliable signal! If I have GPS I have it set up WAY before needing it and back it up with standard instruments as well.
D -
Distance. How far to the next fix? To the runway threshold? Down the ILS? To the Middle Marker? What's the distance from the runway to the missed approach fix?
A -
Airspeed. Memorize them, from initial approach to holding pattern entry and approach speed. What airspeed will you use climbing out on a missed approach? Airspeed is not groundspeed. Is the win helping or hurting you?
R -
Runway and Runway environment. Which runway will you land on? If parallels, Left, or Right? You did read your NOTAMS for runway conditions before takeoff, right? Take a second and look at the runway environment depicted on your approach plate an think about where the buildings are, the width and any slope of the runway, and how it might look on breakout (building to left or right?) to help with your pattern recognition on landing.
T -
Time. Needless to say,everything has a time and a place, and the place for timing is knowing by heart EXACTLY how much time each step down to MDA or DH will require. Keeping track of time can also help if you suffer any equipment failure during the approach.
S -
Safety. Never forge safety. Everything else is done, so apply your ADM skills and have your descent and landing checklist handy, and think through any other aspect of the flight which might have a safety component. Extra low ceilings or visibility, cockpit occupant safety (don't forget yourself!) and the safety aspects of the plane; carb heat, de-icing, and perhaps the biggest one of all; is the landing gear down?
HALFDARTS. A useful acronym I've used for years. I hope you like it! Please use it freely and post any comments back here if you felt it worked well or have suggestions for improvement.
Onwards and Upwards! Rob Bremmer
Posted by
Rob Bremmer
at
11/13/2007 11:47:00 PM
0
comments
Posted by
Rob Bremmer
at
5/16/2007 10:06:00 PM
Labels: aircraft fuel drains, cessna 320, twin engine aricraft turbocharged
FLYOSOPHY - How do you know for sure? Will there be a midair or not? When is the radar right and when is it not?
Posted by
Rob Bremmer
at
4/14/2007 01:43:00 AM
0
comments
Labels: avoidance, flyosophyy, midair collisions, what the controller sees on the scope
I think the Hammerhead turn is the best aerobatic maneuver. It has it all; diving zooming, acceleration, deceleration, near weightlessness, slow flight, turns, sky and good views of the ground!
Start at altitude, of course! Push over briskly for a smooth quick dive. Maybe take your G load down to +.5g on the pushover and stabilize into your descent. Don’t forget left rudder, enough for the Look out to maintain positioning and ground-track, you have a moment before needing to look at the airspeed indicator again, since it takes a moment to build to 145 or so, your hammerhead turn entry speed. At your entry speed, start a smooth quick steady pullback. Maybe about +1.5 to +2.0g. Remember your rudders; just as a steep dive or pitch down requires left rudder, you’ll need right rudder when pitching up! As you pitch above the horizon and keep going up, switch your primary view 90 degrees left or right.
You are watching for the wing to get to 90 degrees perpendicular to the horizon. Perpendicular wings to the horizon mean you are going straight up, which is the goal. This is where it gets a little tricky and needs a little practice. You want to get to straight up before you run out of airspeed, and I don’t mean airspeed dropping so low you might stall, I mean airspeed dropping so low you don’t have enough ruder authority to make a crisp pivot turn at the top. The dangers here are mushing out the bottom of the turn and falling into a sloppy spiral, or a spin entry, or a tailside, which while fun and exhilarating can be damaging to your otherwise sturdy aerobatic steed when the tail slide slams the elevators back against their hinges. But we are not here to talk about the dangers, we are here to talk about how fun it is when you do it right!
As you near the top, it gets quiet. The whoosh of air slows and the controls get softer, just like they do when you slow down when landing. You are almost ready for the turn! JUST before too little airspeed remains, kick full rudder, either direction. The remaining momentum will putt-putt you over the top, and ideally you’ll reach the apex of the turn with one wing straight down and the other straight up just as you peak at your highest altitude for the maneuver. You can’t forget aileron! The plane will generate more lift on the up-wing, and so will need more countering aileron. If you pivot the turn to the right, you’ll need right aileron, making the top left aileron go ‘down’ holding the wing straight in the turn. If you forget aileron going over the top you’ll definitely come out on an un-intended heading, and possibly end up flipping over on your back which quickly turns into a dive recovery.
As soon as that top wing passes straight up and the nose starts dropping below the horizon things are going to speed up quickly! Controls will start getting that solid feel back, and you’ll need to back off the aileron towards neutral and start coming in with left rudder for your dive. If all went nicely, you’ll be on the reciprocal heading you had when you entered the maneuver, and you’ll be in a nice clean dive. You only have one thing to decide; throttle back and ease back into level flight, or leave it at full throttle and do it all over again! It’s nice to have such choices.
onward & upward! ~ rfb
Posted by
Rob Bremmer
at
3/12/2007 01:35:00 AM
0
comments
Labels: aerobatic maneuvers, aerobatics, hammerhaead turn
LOGBLOG
An IFR business trip goes way past merely interesting when encountering an embedded thunderstorm, complete with hail, visible cloud-to-cloud lightning, and moderate to extreme turbulence, and to cap off the experience, St. Elmo's fire.
8/11/1982 - San Diego to Farmington New Mexico and return; one day business trip.
PA-28RT-201. N2057M. SDM - FDM - SDM. 7.9 total hours. (Night3.9, IFR 4.6) 2 VOR approaches.
I think it was the philosopher Nietzsche who said 'That which does not kill me makes me stronger." Words that fit for this flight! I knew we would have IFR on a business trip going to Farmington New Mexico. I worked as a computer salesperson for a small computer firm, and was taking our lead programmer over to our latest client, to complete an installation session.
We departed Brown Field near San Diego filing IFR from the start, and sure enough, we were in and out of clouds within the first 30 minutes, but it was early in the day, and they had not grown into anything menacing, yet. My plan was to wait until later in the evening for our return, knowing the forecast was for activity to die down after sunset. We were flying a Turbo Arrow III, a beautiful cross country aircraft. I noted on the way over that the AI made louder whining noises on start-up but quickly behaved normally after take off.
We stayed later than anticipated, with a programming problem, and left after 8pm for our return flight. It was dark and nearly solid cloud cover was expected for our return flight. I was concerned about remnant thunderstorms, so my plan was to monitor the other traffic, noticing who else was flying in our size range, and judge from that if I should continue or divert. Soon after contacting approach I heard several other small aircraft on frequency, one ahead of us, and the air was acceptable to them so I pressed on. We wre flying in the St. Johns area.
About 30 minutes after departure, level at cruise and in solid cloud, the controller asked if we would take a vector around a section in front of us he reported as showing 'heavy activity.' Gratefully I accepted and made the heading change. Within three minutes we hit our first 'whump' of turbulence, and it just kept getting worse. I recalled an older pilot telling me it's often better to push straight ahead under control than to lose control in a turn trying to avoid rough air,' so I pressed ahead.
The turbulence increased, then came the hail. Not just little bitty hail; hail so hard and loud I was terrified and in awe that the windscreen did not crack. Not that I had much time to look out, as I was very busy with my hands and eyes. I was making nearly full control deflections in all directions and up to 75% throttle adjustments, and just managing to keep airspeed in the green and altitude within 500 feet of of assigned. This was truly 'attitude flying' I remember thinking.
The hail grew louder. I was completely focused and time seemed to alternate between very fast and slower than normal. If the controller had tried to talk to me I don't think at that moment I would have acknowledged. Then everything got worse a notch, and I saw lightning flash to port of the aircraft and slightly behind. That was when I felt a cold sweat for the first time in the episode. Immediately after the lightning, the avionics began generating a strange clicking and humming, and the needles started to jump erratically and time seemed to slow down. In front of me, unbelievably, the tips of the propeller began to glow, describing a green arc, which intensified, and began moving down the propeller arc and started to flicker across the top of the cowling.
At that moment, for the first time, I was not sure of what I was seeing. Later I learned it was classic St. Elmo's fire, and the next incident was a stroke of true luck; we popped out of a wall of clouds into the most beautiful clear and calm night sky you could imagine, with a million stars twinkling over the desert sands down below. A moment later the controller came on the quiet frequency " Five Seven Mike, how is your flight?" "We're okay." I reported back, but it was pretty intense back there. "Glad I could steer you around the heavy stuff." he replied.
Twenty more minutes into the flight, the AI rolled over and died. I covered it with a piece of paper, told the controller, and we continued homeward, under mostly VFR conditions. The IFR approach through the thin marine layer at Brown field was anti-climactic even with the failed AI, after what we had been through.
The next day, examining the aircraft, all was fine except for the broken AI, and the paint on the leading edges of the wing in about a 1 inch wide stripe, was stripped to shiny aluminum. The rest of the plane was astonishingly clean, however.
Looking back, I can't believe I flew that IFR trip without onboard radar! In retrospect, on the plus side, I learned my training was good; it all worked for me that night. My judgement? In hindsight I would have picked up a motel room and left the next morning at sunrise under dewy clean sunlit morning skies.
The best advice I can offer: don't fly into embedded T-cells, period, even if you think they won't be a factor. The second best advice? If you do, just fly the attitude. Focus on keeping the wings level and the airspeed within reason and if you take care of these two issues, you'll stand a chance.
I know this sounds like a tall story, but somewhere out there, perhaps reading this and remembering, are a programmer who will never forget how nature displayed her use of charged electric particles, and a controller who probably still feels good about being able to help out a pilot just trying to fly home.
Onward & Upward! ~ rfb
Posted by
Rob Bremmer
at
1/30/2007 08:16:00 PM
0
comments
Labels: Hail, IFR, LOGBLOG - Christmas day flight, night flight, thunderstorm clouds, turbulence AI

REVIEW
'Catalina Island is the place to be', as the old song says. Fun for pilots, fun for passengers, for a day, a hike, a swim, or an overnight adventure in Avalon.
Living in Southern California, Catalina was one of my favorite destinations. Once owned by Mr. Wrigley, of chewing gum fame, the airport was a private strip created by flattening the top of a mountain. Now it is a paved strip with an attendant, unicom, a restaurant and transportation into the town of Avalon down by the sea, and open to all.
Pilot challenges abound. First, you have to decide what altitude to use, which is dependant on whether you angle out to sea from the south coast or from the north prior to reaching the Los Angeles area, or choose instead to fly lower with less water to cross but having to communicate with LAX controlled airspace and watching out for large volumes of traffic coming from every direction.
It's a right-hand pattern when the typical runway 22 is used as the winds are blowing from the west, but here's where the real fun begins. The airport is at the top of a mountain, and on all sides terrain rapidly falls away towards the sea. Your turn to base and final are out over the ocean, over a thousand feet higher from a ground reference than you are used to at that point. It feels like making a turn in space, but remember, you are working not off sea level below you but the top of the mountain, which you are turning back to meet. This makes judging pattern and altitude tricky, yet it can be accomplished best by keeping a close watch on your altimeter and the VASI on final. The fun is not over yet, though. The wind blowing over the top of the mountain often creates strong laminar flow with a downturn - you guessed it - right before the landing touchdown zone, which means you have to be ready for a healthy addition of power on final to hold your glide path.
But wait, there is more! The runway has a slight rise, with a subtle peak in the middle. This means just as you touch down, you look down the runway and see the apparent length diminishing very rapidly. There are a LOT of brake skid marks from prior pilots who thought they were going over the edge on the far side, but just like you, they successfully crest the middle of the runway to realize they still have a half runway left. Turn off to the left, and find a parking space and register your plane inside the building.
Now the ground fun starts! For lunch, have a buffalo burger, at the restaurant with a spectacular view out to sea. The buffalo are from the island. They are rumored left over from a movie shoot early last century and are regularly harvested and served. I found it better than any hamburger I've had before.
You can sign up for a ride down the bumpy hill to the town of Avalon, which in all ways is a sleepy beach town with a great history. Visit the beautiful casino building at the end of the promenade. Tour the Wrigley mansion. Skin dive or S.C.U.B.A. dive and swim with orange Garibaldi, the California state fish; among one of many species you will see. Get a room for the night or a weekend. Rent a boat. Swim, or hike to the other side of the island on a week-long backpacking trip.
When you are ready to leave, there is one last treat the island airport offers. As you take off, when you would be typically 200 feet above the ground, the end of the runway drops away over a cliff and the zoom effect is stunning, you feel for all the world like you are in a rocket climbing to space.
I've flown many aircraft to Catalina; a Kachina Varga, Aeronca 11AC, Stinson Voyager, many Cessna's and Pipers, and a Cessna 320. The fun never ended and each aircraft allowed me an opportunity to explore the challenges - and rewards - one more time. Someone once flew a glider from the mainland, with photos on the walls to prove it, however they did need a tow back to the mainland.
Here are a few useful links:
http://www.catalina.com/airport.html - About getting to Catalina Island and contact information.
http://airports.pilotage.com/avx/ - Specific airport info with a good aerial photo of the airport.
http://www.micheloud.com/FXM/Flying/Catalina.htm - An interesting site with many images and tips.
http://www.catalinachamber.com/ - Chamber of Commerce, official Catalina Island website.
This is one destination worth traveling to as you head up or down the coast, or as an end destination unto itself. Enjoy your flight!
Onward & Upward! ~ rfb
(the image shown is a computer generated image in Microsoft Flight Simulator accurately reflecting the approach to Runway 22 at Catalina. I applied digital filters to the image to make it more artistic and interesting).
Posted by
Rob Bremmer
at
1/13/2007 11:53:00 PM
0
comments
Labels: a fun place to fly and travel, Catalina Island, off the Southern California coast., REVIEW - Destinations