Mentor
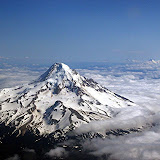
Any pilot can create aerial photographs. Aerial photography does not require expensive equipment or owning an aircraft, though either can be helpful. Here are a few tips and examples.
Mention 'aerial photography' and most people think of satellite type imagery, razor clear, shot at noon to minimize shadows and usually from directly overhead. Typically this is used by government agencies, land-use groups, engineers, contractors, and sometimes for art. It is accomplished with high performance aircraft, often twin engine, and expensive belly-mounted cameras. Yet a handheld digital camera and a rental Cessna can also accomplish amazing and rewarding results. Here are some specific considerations, in the order I think are most important:
1.
Plan the flight for safety first. How low can you legally go over the ground? If it is an urban area, you may need to use a strong telephoto lens, 180mm or more, to compensate for the extra altitude required above the ground. You may need to be in communication with any nearby controlled airspace. You will need someone to help keep an eye out for traffic or share flight and photographer responsibilities, and you need to discuss strategy before the fight; who does what, and when? How long for the shoot? Plan for safety first, all else comes later.
2.
Plan for camera angle and 'window shooting angle.' High wings seem best, but lowered wings can block angles and gear and struts can block views. Sometimes Low wing aircraft with small vent windows can work well - remember, the camera lens is small; you only a small opening for a clear air shot. Know your aircraft well enough to know where the best angle occurs, and practice putting objects in that view. Sometimes that requires a turn. I remember successful shoots from a Diamond Katana where the camera went out the plexi vent window, and the plane was banked about 20 degrees wing down, providing an arc around a medium distance ground target and offering an unobstructed view of the photo-target. If you don't like the angle, get closer or farther away, or higher or lower; always mindful of safety of course. Don't worry about looking through the viewfinder, I find it seldom matters. Practice locating the object you want to shoot in the best 'shoot window' for your aircraft and point your camera straight through that opening, and concentrate on flying while clicking away. You can edit and compose later.
3.
Plan for the light. Cloudy days are good if you want to eliminate shadows. Sunny days can be good if you want dramatic lighting effects which occur with low sun angles in morning and evening, and strong yellow orange light as the suns rays go through the longer section of atmosphere before striking the ground. Mid-day sun is good for strong colors and minimized shadows. Don't worry if you have to shoot through plexi glass, you can use digital editing available on most mid-level editing programs to edit out effects from Plexiglas. Shoot with the sun behind you or up to 90 degrees from behind you. Shooting towards the sun creates silhouettes and usually poor imagery.
4.
Plan for emotion. You see with your eye a special scene. It moves you. You shoot it with your camera, and later you realize it is a bad photograph, cluttered, or otherwise un-dramatic. Why? This is because your emotions are triggered by the image but the camera does not capture emotion. So you have to be willing to edit out power lines, etc, later, or plan for dramatic low level light , or practice placing the object in the viewfinder in a unique way. Cameras do not capture feeling, only light. Think about how to convey feeling and meaning.
5.
Plan for vibration. Shoot at shutter speeds of 1/1000 sec or higher. I've had success down to 1/125th of a second, but at that speed it is hard. Wide angle lenses pick up the least motion blue, telephotos the most. and touching any part of the camera to any part of the aircraft during the shoot guarantees engine vibration will alter your image. When my primary responsibility is photographer in the aircraft, I often make a crook of one arm, bracing that had on my shoulder, and resting my camera hand on this vibration absorbing brace, or if the shutter speed is high enough, I just make sure the lens and camera are as far from vibration sources as possible.
6.
Type of camera. I've used many different types. I've been happiest with two, a Canon Powershot for simple scenics and when I travel, and a larger professional Nikon with interchangeable lens ranging from 18mm to 300mm.
7.
Editing is key. Slide film is go,d I used Kodachrome 64 ASA for years, but despite it's brilliant color saturation and detail, digital is getting good enough to be the best thing going. With digital you want the largest screen size, finest resolution and as many megapixels as you can afford. The ones you see in this blog were mostly taken with 4 megapixels so judge accordingly. More sophisticated editing programs are available, but Microsoft Digital Editing Suite does a nice job for the cost. Experiment with contrast, saturation and many other digital editing techniques until you find the photo pleasing or until you decide to use filters to turn it into your own unique digital art. Remember to always save a file copy before beginning your edits, just in case!
Bottom line - get a friend, get a plane, get a camera and go give it a try!
Onward & Upward! ~ rfb


 Posts
Posts