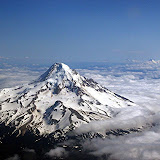
How to make aerial photos from the window of an airliner 'more better.'
This is a response to the comments posted earlier. It seems there is a lot of interest in this subject! Besides setting a low ASA, (which reduces the graininess) you want to get the best f stop at the highest shutter speed. I find any shutter speed over 250th of a second guarantees I'll get rid of any vibrations (higher speeds are better in turbulence) and then I set the f stop for the smallest aperture possible without driving the shutter speed lower. As for focus, my camera, a mid - level Canon digital SLR style camera, will usually work fine on auto focus, but if it does not I set it to manual and set it to infinity.Hopefully the sun angle is low, like you would get from sunrise to around 10 am or 3 pm to sunset. The lower the angle, the more dramatic the shot as their will be more color possibilities and better contrast from shadow detail. Alas, we cannot always choose our flight for the sun angle!Your goal is to get the target image in or near the center of the image, with no parts of the airplane in sight. Try to shoot through clear sections of class if your window is smudgy, and if it is smudgy on the inside, you may be able to clean it a bit with a blanket or cloth. Yet capturing the image i just half the story. Think of it as capturing the 'raw data.' When you bring the image up on you computer, it will typically have a bluish sheen from reflectivity and shooting through the Plexiglas. If the details on the ground are strong enough you can significantly or even completley 'tune out' this image problem by increasing the brightness and contrast in even the most basic photo editor. The Google Picasa editor (free download) can do this for you, or you can use the Microsoft Photo edit suite, which I also use. The three ares I usually use to tweak a photo and dial out the glare are contrast, brightness and color temperature. Sometimes I sharpen the image with focus, if necessary. I hope that helps! If anyone gets an interesting shot they would like to share, email me at rob.bremmer@gmail.com and I'll post your photo an give you photo credits. I hope ths helps those who are interested.
onwards and upwards!
Rob Bremmer
Google Search from Why2Fly
Wednesday, July 30, 2008
Monday, July 28, 2008
Crater Lake - Aerial photos from airliner window seat

You might think you need a small plane or a big budget to take interesting aerial photographs but that isn't true! Photos taken from the seat of any airliner, with a little planning, can yield spectacular results.
These photos of Crater Lake were taken from a right-side passenger window seat in front of the wing of a Horizon Air RJ Regional Jet on a flight from Southern California to the Pacific Northwest. It does require a little planning ahead to capture such shots, for example, having a window seat is very helpful, and a clean window is important too! You also want to sit in front of the wing, as far in front as possible to maximize opportunities to see the ground. Behind the wing can be interesting, but the wing will limit your view forward and if the aircraft has wing mounted engines the thrust and exhaust gases will distort the air, ruining a clean view of any object on the ground. Sitting over the wing renders ground shots useless, but interesting cloud shots can still be obtained!
Any digital camera will work, but the better ones allow you to set a lower ASA number and maximize the quality of the photo in terms of photo size which equates to more megabytes per image. A zoom lens is helpful but not necessary. Sometimes a wide angle will give more interesting shots encompassing sky and land, yet a telephoto, while allowing the appearance of closeups, can highlight haze in the atmosphere and is more inclined to pick up shaky vibrations which blur the shot.
Don't conserve shots! Shoot like crazy; it's digital, so after the opportunity has passed by the window, you can edit away the weaker images. Remember you are traveling at over 200 miles per hour so when you see look as far ahead of the plane as you can and when you see something that looks interesting get your camera ready and start taking pictures!
I could mention that while I was taking these images I was being served complimentary chilled northwest micro-brews, a unique and classy service on the last remaining civilized airline in the United States, but that would be an entirely different story!
onwards and upwards!
Rob Bremmer
Posted by
Rob Bremmer
at
7/28/2008 11:33:00 PM
2
comments
Labels: aerial photos for anyone, Crater Lake aerial photo, digial aerial photography, good photos from an airliner window seat, Horizon Air, Oregon natural monuments
Friday, July 18, 2008
Please take the SURVEY about flying
I've added a small survey to uncover the predominant reason people don't fly as much as they could.Please take the survey, and check back later for the results.
onward and upward!
~ rob bremmer
Posted by
Rob Bremmer
at
7/18/2008 08:17:00 PM
1 comments
Labels: A survey on why to fly and why you don't fly more often. check aviation survey results often
Tuesday, July 15, 2008
"I've looked at clouds from both sides now!"


As the old song suggests, the visual beauty of clouds may be appreciated from the top looking down as well as the more traditional bottom looking up. This post is in honor of John Day, a physicist who recently passed away, and spent his life studying clouds and promoting cloud watching. I feel certain he would have enjoyed flying, leaning out an open airplane window and taking photographs of clouds from the top to compliment the view from the ground.
I only just learned of Dr. Day and his work recently. He studied clouds, wrote about clouds and cloud physics, turned cloud photos into art and even got the US Postal service to put one of his cloud photos on a postage stamp.
Knowing this I am convinced I would have enjoyed talking to the man and I believe he would have enjoyed discussing and comparing images and stories about clouds. As a pilot, I've always watched clouds and whenever possible, taken photos from an airliner window as well as open cockpit and open window small planes. Clouds can be just as fascinating when viewed from the top looking down, as they can be from the bottom looking up!
The three photos here are my favorite cloud images recently shot. The orange mammatus cloud shapes were at Sunriver after a thunderstorm. The striation lines of clouds cast interesting shadows over the Bitterroot mountain range while flying east, and Mount Hood makes an early summer roadblock for a mid-level line of stratus, forced to curve around the shape of the mountain.
You can view Dr. Day's images and read more about him and his work on his website, at www.cloudman.com.
onwards and upwards,
Rob Bremmer
Friday, July 4, 2008
An American Pilot flying on the 4th of July
7-4-08
America is unique in many ways and certainly one of the most special and precious is the freedom to fly. As I think back over the years of flying aircraft I can recall a few flights taken on the 4th of July and I can recall the surge of feeling which arises when flying and seeing fireworks displays. One memory stands clearer than all the others.
It was the mid 1980’s and I was flying from San Diego north through the LA basin. The plane was a Grumman Tiger, an AA-5B, an aircraft with exceptional visibility through the bubble windscreen and the side windows, despite the low wing which often can block a view. The day was warm and the departure from Gillespie field was just after sunset, which put us inside the Los Angeles basin well after dark. We were flying low and wide, to skirt the Class B Airspace (A TCA to those of you who flew with the older designations). Flying under the shoulder of a controlled airspace is best accomplished by charting a distant landmark and a nearer landmark that create a line clear of the controlled area, So that you can keep your eyes outside the cockpit and just concentrate on holding your altitude and enjoying the view as you stay on track on your courseline.
This technique frees you to keep a maximum lookout for other traffic, which is easier to see at night than in the daytime since you need only look for anti-collision, landing, and navigational lights. This also means your eyes are drawn quickly to assess moving lights, and on this evening, with clear nighttime air, fireworks displays popped out in stark contrast to the black hills to the east of the valley.
The effect of seeing the displays all around us, in front, to the rear quadrants and to the sides both near and far was inspirational. My passenger and I were Americans, flying an aircraft on our own, in free and clear skies and seeing the celebration of that national freedom surrounding us with dazzling and sparkling displays of lights, bursting and shimmering like rapidly blooming and fading flowers of brilliant light.
Soon we were through the valley and on into the darkness of the terrain enroute to San Luis Obispo. The radio chatter was nearly gone and the sights to look at were nearly non-existent, so much so we were using the instruments as much as outside reference to aid our VFR flight into the black night. Above us the stars filled the sky and my only thought for a while was the good fortune I held as pilot controlling an aircraft in flight.
The instrument panel glowed with a warm red light and the white wings caught the alternating flash of the anti-collision light from the top of the vertical stabilizer. A deep breath in and a long gentle exhale while I soaked in the scene around me. My wish was that others might be able to feel the sense of incredible satisfaction, joy and a calm resolute peace which comes at such a moment, a moment I am certain occurs more often for pilots than anyone else on earth.
onward & upwards!
r. bremmer
Posted by
Rob Bremmer
at
7/04/2008 07:39:00 PM
1 comments
Labels: flying on the 4th of July
Tuesday, March 11, 2008
SunRiver - Flying and Nature

We are in a canoe, a blue canoe, and paddling slowly down the Deschutes, along the right bank, following the current. We are in a natural areas of astonishing beauty. Riders on horseback kick up puffs of dust along a riverside trail. Overhead, a red and white Travelair, with “Bi-plane Rides” stenciled beneath the bottom wing purrs along the river, the unmistakable sound of the rotary engine thock-thocking into the distance. A few lazy paddle strokes and we watch the now-distant biplane enter a steep bank and turn back, descending for a landing, the site seeing flight over. The Bi-plane disappears behind the low trees towards the airport. A few more lazy paddle strokes and a Cessna Citation, approaching from the north on a descent for the airport whistle –hums along, quietly for a jet, and very very smooth. It’s fuselage glistens and the sun catches the shining leading edge of the wing. It too disappears behind the trees. We stop and admire a flowering plant along the marshline, purple and white on a thick stalk. The sky is cobalt blue and the river is clear and translucent, a blue so dark it is nearly black. A dragonfly zips by. I angle the canoe away from the eddy and push towards the main current flowing around the bend.
Overhead a high performance soarplane appears, white long winged and slender, whistling through the wind. The soarplane is low, very low yet also very fast. They are playing with energy, storing it in airspeed for a conversion into altitude. They whistle over the footbridge, so close you could touch them, you think, though they are probably over 100 feet above us. We in our slow moving canoe, they in their speeding soarplane, a contrast in vehicles and ways to move. They hit an invisible marker at the tall pine tree and pull up steeply, slowing, airspeed dwindling while altitude gains. They tip back to level by dropping the nose and they are suddenly at pattern altitude, lazily floating along at 50 mile per hour, a thousand feet higher overhead. The high performance craft seems alive, shimmering with energy from the wind and the sun, dancing a balance between gravity, lift, thrust and drag. Approaching the pattern entry point, the soarplane abruptly pulls up, converting airspeed energy into altitude energy. Now at pattern altitude, perhaps 300 feet higher and significantly slower, the soarplane meanders out of site behind the treeline, established on downwind for their pattern and landing.
I take another paddle stroke, realigning the canoe with the Deschutes current and marvel at how aviation and a wilderness river area can fit so well together. At SunRiver, the airport is a harmonious and integrated component. It provides an open area where in winter coyotes hunt mice beneath the snow in the fields around the airport and in summer deer and horses roam the same fields. The airport provides an alternative transportation source to the area, an income source for some businesses directly and indirectly, if customers who land then spend money off the airport at a restaurant or other establishment.
Soon the airport and pattern area disappear from sight, and my mind drifts with the current and the canoe, and the simple joys of a river on a sunny summer day. Today it is the slow route on the river, discovering what may be around the next bend. It’s not too different from flights taken where the discoveries are beyond the next ridgeline or over the mountain range on the horizon.
Our natural environment is awe inspiring, and SunRiver is one of those rare places where different ways to explore and come to understand our environment all come together in one location. Nature attracted me to flying, the opportunity to be immersed in the environment enjoy it moment by moment. Some of my best inspiration arose while flying and SunRiver is the type of place where pilots and those who simply love to fly and experience the outdoors can spend time relaxing and remembering why they became involved in flying and exploring the great outdoors.
onwards & upwards!
r bremmer
Posted by
Rob Bremmer
at
3/11/2008 10:52:00 PM
0
comments
Labels: biplanes, canoes on the deschutes river, Destinations, jets, live airport webcam Review - Sunriver 2 of 2, soaring
Thursday, November 15, 2007
50 years ago we had a VTOL airliner!
Rotodyne - What an amazing aircraft!
You have to see this to believe it. If you know why it never achieved production, please tell us. If you think it should be resurrected, tell us that, too.
Click on the link, or cut and paste, to watch the video and listen to the narrator.
http://www.youtube.com/watch?v=y9633v6U0wo
Onwards and Upwards ~ rfb
Posted by
Rob Bremmer
at
11/15/2007 12:25:00 AM
0
comments
Tuesday, November 13, 2007
In the business world, there are so many TLA's (Three Letter Acronyms) it is hard to keep them straight. But in aviation they are an important part of your ADM (Aeronautical Decision Making) and fit into your CRM (Cockpit Resource Management). I've even invented a few. Here is one of my favorites!
Instrument flying, especially solo IFR, can be a handful. Every technique that reduces your workload and helps you maintain procedures is a good technique. From the IAF (Initial Approach Fix) inbound to a landing or a go around from an instrument approach, there are some specific elements which must occur every time. The acronym HALFDARTS (think of half a dart flying to the airport) can help you when entering your approach phase. They are in he order I like to pay attention to them. I find in practice this flows well.
H -
Heading. Heading is certainly the most critical; if you are not heading towards the next fix, or the OM (Outer Marker) everything else is a mot point and you may be rapidly flying into danger. Remember that heading is not course. Heading takes into consideration any WCA (Wind Correction Angle) necessary to maintain your desired courseline, which only becomes more critical as you approach your landing zone. Take a moment to think about what headings you'll use, maybe dial a heading into your VOR/OBS; double check the Heading on your Heading Indicator, and look over any headings you'll need through the rest of the approach and the missed approach too.
A -
Altitude. Just as with heading errors, altitude errors can get you quickly into trouble, though at least you'll be on the right heading, right? Set your altimeter to the airport altimeter setting, and commit to memory the altitudes for each phase of the approach, including MDA (Minimum Descent Altitude) or DH (Decision Height) if it is a precision approach, and be sure to include your missed approach altitudes as well.
L -
Lighting. Why worry about lighting now? Because at this stage of the approach you have the mental bandwidth to set up the cockpit lighting the way you'll have best visibility during the approach and still be able to see outside for approach lights at breakout, You'll have the time to think about and set landing lights, nav and recognition lights, and think about whether you want strobes on or not, since they can be disorientating in clouds. While you are thinking about lighting, what is your emergency lighting plan? A lighting emergency on final approach won't be so bad if you can quickly put your hand on your flashlight.
F -
Frequencies. Run through and set your frequencies. If you pre-set frequencies, do so. I like to have approach and tower on the number one comm radio and ATIS / ASOS and ground control on the number two comm, but that's just my preference. I also like to use all nav equipment I have on an actual approach, so each receiver will be turned in to an appropriate frequency. If I have a number two nav not in use I'll set i to the ILS or approach course as a back-up, and I'll pay attention to the audio, testing and setting each with appropriate squelch levels, and leaving he audio on the primary approach navaid up just loud enough to hear the morse code identifier during the approach. No audible identifier, no reliable signal! If I have GPS I have it set up WAY before needing it and back it up with standard instruments as well.
D -
Distance. How far to the next fix? To the runway threshold? Down the ILS? To the Middle Marker? What's the distance from the runway to the missed approach fix?
A -
Airspeed. Memorize them, from initial approach to holding pattern entry and approach speed. What airspeed will you use climbing out on a missed approach? Airspeed is not groundspeed. Is the win helping or hurting you?
R -
Runway and Runway environment. Which runway will you land on? If parallels, Left, or Right? You did read your NOTAMS for runway conditions before takeoff, right? Take a second and look at the runway environment depicted on your approach plate an think about where the buildings are, the width and any slope of the runway, and how it might look on breakout (building to left or right?) to help with your pattern recognition on landing.
T -
Time. Needless to say,everything has a time and a place, and the place for timing is knowing by heart EXACTLY how much time each step down to MDA or DH will require. Keeping track of time can also help if you suffer any equipment failure during the approach.
S -
Safety. Never forge safety. Everything else is done, so apply your ADM skills and have your descent and landing checklist handy, and think through any other aspect of the flight which might have a safety component. Extra low ceilings or visibility, cockpit occupant safety (don't forget yourself!) and the safety aspects of the plane; carb heat, de-icing, and perhaps the biggest one of all; is the landing gear down?
HALFDARTS. A useful acronym I've used for years. I hope you like it! Please use it freely and post any comments back here if you felt it worked well or have suggestions for improvement.
Onwards and Upwards! Rob Bremmer
Posted by
Rob Bremmer
at
11/13/2007 11:47:00 PM
0
comments
Wednesday, May 16, 2007
Mentor - Complex fuel systems in light twins
All planes have fuel drains. Some have more. The Cessna 320 I was flying had ten.
The Cessna 320 I flew for a student, who happened to be both my student pilot and a practicing psychologist, was an amazingly wonderful plane. Twin turbocharged Lycoming 6 cylinder engines. Able to do 295 mph true airspeed. An absolute joy to fly and getting used to the speed after slower planes was always a bit of an eye-opener. The plane was co-owned, actually, by a psychologist who liked to go fast and a Tuna boat captain who thought high speed was 10 knots. It made for some interesting conversations on trips!
The most interesting aspect was without a doubt the fuel system. Each wing had a wingtip tank able to hold 50 gallons, and an inboard reserve tank of about 15 gallons, as I recall. The inboards had a unique characteristic; they could pump fuel out twice as fast as the engine could burn it. That meant you had to manage the fuel in a certain way.
On take off, both engines would burn from the mains. the rate of consumption on the fuel gauges was about what you would expect from those fuel injected turbocharged engines, but it was twice what you would expect when you switched over to the auxiliary tanks! To keep from porting fuel overboard, you would need to burn down your mains at least 10 gallons a side, then switch to auxiliaries and run them nearly dry. While you were doing this, your auxiliary fuel gauges would be dropping as though you had a hole in the bottom of each tank, and at the same time the main fuel gauges would be showing the tanks filling up!
For such an interesting fuel system, you would not be disappointed when you went underneath to work the system drains. A drain on each main. One on each auxillary. One on each engine. That's 6 so far. One on each cross-feed bringing the total to 8 and two in the system feeding fuel to the heater in the nose, for a total of 10 fuel drains to check before each flight!
All in all, flying that plane was worth it. It hummed and sang and flew straight and true. There were a few other idiosyncrasies, but I'll save those for another day.
onward & upward! ~ rfb
Posted by
Rob Bremmer
at
5/16/2007 10:06:00 PM
Labels: aircraft fuel drains, cessna 320, twin engine aricraft turbocharged
Saturday, April 14, 2007
FLYOSOPHY - Are you still there?
FLYOSOPHY - How do you know for sure? Will there be a midair or not? When is the radar right and when is it not?
"Cessna 14 Romeo, be advised traffic at 12 oclock, 3 miles, unknown altitude."
"14 Romeo, Looking."
"Cessna 14 Romeo, traffic 12 oclock and two miles."
"14 Romeo looking."
(Now, visibility was perfect, and there appeared to be NOTHING in front of me, but the controller was seeing SOMETHING and even though it was probably substantially higher and maybe lower, I was starting to get concerned).
The controller's voice became a little tighter.
"Cessna 14 Romeo, traffic 12 oclock, 1 mile, advise in sight."
I was really straining my neck now and rocking the wings, still, nothing.
"14 Romeo, looking, no traffic." was all I could say.
The moment of the possible collision came and went. The controllers next words, somewhat hesitantly -
"Cessna 14 Romeo, you there?"
Even if your eyes see nothing a radar screen will make you think twice. I never did see the other aircraft, which proceeded merrily eastbound, off frequency, unaware of any issue.
onward & upward! ~ rfb
Posted by
Rob Bremmer
at
4/14/2007 01:43:00 AM
0
comments
Labels: avoidance, flyosophyy, midair collisions, what the controller sees on the scope
Monday, March 12, 2007
MENTOR - Aerobatics: Hammerhead Turns
I think the Hammerhead turn is the best aerobatic maneuver. It has it all; diving zooming, acceleration, deceleration, near weightlessness, slow flight, turns, sky and good views of the ground!
Start at altitude, of course! Push over briskly for a smooth quick dive. Maybe take your G load down to +.5g on the pushover and stabilize into your descent. Don’t forget left rudder, enough for the Look out to maintain positioning and ground-track, you have a moment before needing to look at the airspeed indicator again, since it takes a moment to build to 145 or so, your hammerhead turn entry speed. At your entry speed, start a smooth quick steady pullback. Maybe about +1.5 to +2.0g. Remember your rudders; just as a steep dive or pitch down requires left rudder, you’ll need right rudder when pitching up! As you pitch above the horizon and keep going up, switch your primary view 90 degrees left or right.
You are watching for the wing to get to 90 degrees perpendicular to the horizon. Perpendicular wings to the horizon mean you are going straight up, which is the goal. This is where it gets a little tricky and needs a little practice. You want to get to straight up before you run out of airspeed, and I don’t mean airspeed dropping so low you might stall, I mean airspeed dropping so low you don’t have enough ruder authority to make a crisp pivot turn at the top. The dangers here are mushing out the bottom of the turn and falling into a sloppy spiral, or a spin entry, or a tailside, which while fun and exhilarating can be damaging to your otherwise sturdy aerobatic steed when the tail slide slams the elevators back against their hinges. But we are not here to talk about the dangers, we are here to talk about how fun it is when you do it right!
As you near the top, it gets quiet. The whoosh of air slows and the controls get softer, just like they do when you slow down when landing. You are almost ready for the turn! JUST before too little airspeed remains, kick full rudder, either direction. The remaining momentum will putt-putt you over the top, and ideally you’ll reach the apex of the turn with one wing straight down and the other straight up just as you peak at your highest altitude for the maneuver. You can’t forget aileron! The plane will generate more lift on the up-wing, and so will need more countering aileron. If you pivot the turn to the right, you’ll need right aileron, making the top left aileron go ‘down’ holding the wing straight in the turn. If you forget aileron going over the top you’ll definitely come out on an un-intended heading, and possibly end up flipping over on your back which quickly turns into a dive recovery.
As soon as that top wing passes straight up and the nose starts dropping below the horizon things are going to speed up quickly! Controls will start getting that solid feel back, and you’ll need to back off the aileron towards neutral and start coming in with left rudder for your dive. If all went nicely, you’ll be on the reciprocal heading you had when you entered the maneuver, and you’ll be in a nice clean dive. You only have one thing to decide; throttle back and ease back into level flight, or leave it at full throttle and do it all over again! It’s nice to have such choices.
onward & upward! ~ rfb
Posted by
Rob Bremmer
at
3/12/2007 01:35:00 AM
0
comments
Labels: aerobatic maneuvers, aerobatics, hammerhaead turn
Tuesday, January 30, 2007
LogBlog - Learning to Fly IFR in Fire and Ice
LOGBLOG
An IFR business trip goes way past merely interesting when encountering an embedded thunderstorm, complete with hail, visible cloud-to-cloud lightning, and moderate to extreme turbulence, and to cap off the experience, St. Elmo's fire.
8/11/1982 - San Diego to Farmington New Mexico and return; one day business trip.
PA-28RT-201. N2057M. SDM - FDM - SDM. 7.9 total hours. (Night3.9, IFR 4.6) 2 VOR approaches.
I think it was the philosopher Nietzsche who said 'That which does not kill me makes me stronger." Words that fit for this flight! I knew we would have IFR on a business trip going to Farmington New Mexico. I worked as a computer salesperson for a small computer firm, and was taking our lead programmer over to our latest client, to complete an installation session.
We departed Brown Field near San Diego filing IFR from the start, and sure enough, we were in and out of clouds within the first 30 minutes, but it was early in the day, and they had not grown into anything menacing, yet. My plan was to wait until later in the evening for our return, knowing the forecast was for activity to die down after sunset. We were flying a Turbo Arrow III, a beautiful cross country aircraft. I noted on the way over that the AI made louder whining noises on start-up but quickly behaved normally after take off.
We stayed later than anticipated, with a programming problem, and left after 8pm for our return flight. It was dark and nearly solid cloud cover was expected for our return flight. I was concerned about remnant thunderstorms, so my plan was to monitor the other traffic, noticing who else was flying in our size range, and judge from that if I should continue or divert. Soon after contacting approach I heard several other small aircraft on frequency, one ahead of us, and the air was acceptable to them so I pressed on. We wre flying in the St. Johns area.
About 30 minutes after departure, level at cruise and in solid cloud, the controller asked if we would take a vector around a section in front of us he reported as showing 'heavy activity.' Gratefully I accepted and made the heading change. Within three minutes we hit our first 'whump' of turbulence, and it just kept getting worse. I recalled an older pilot telling me it's often better to push straight ahead under control than to lose control in a turn trying to avoid rough air,' so I pressed ahead.
The turbulence increased, then came the hail. Not just little bitty hail; hail so hard and loud I was terrified and in awe that the windscreen did not crack. Not that I had much time to look out, as I was very busy with my hands and eyes. I was making nearly full control deflections in all directions and up to 75% throttle adjustments, and just managing to keep airspeed in the green and altitude within 500 feet of of assigned. This was truly 'attitude flying' I remember thinking.
The hail grew louder. I was completely focused and time seemed to alternate between very fast and slower than normal. If the controller had tried to talk to me I don't think at that moment I would have acknowledged. Then everything got worse a notch, and I saw lightning flash to port of the aircraft and slightly behind. That was when I felt a cold sweat for the first time in the episode. Immediately after the lightning, the avionics began generating a strange clicking and humming, and the needles started to jump erratically and time seemed to slow down. In front of me, unbelievably, the tips of the propeller began to glow, describing a green arc, which intensified, and began moving down the propeller arc and started to flicker across the top of the cowling.
At that moment, for the first time, I was not sure of what I was seeing. Later I learned it was classic St. Elmo's fire, and the next incident was a stroke of true luck; we popped out of a wall of clouds into the most beautiful clear and calm night sky you could imagine, with a million stars twinkling over the desert sands down below. A moment later the controller came on the quiet frequency " Five Seven Mike, how is your flight?" "We're okay." I reported back, but it was pretty intense back there. "Glad I could steer you around the heavy stuff." he replied.
Twenty more minutes into the flight, the AI rolled over and died. I covered it with a piece of paper, told the controller, and we continued homeward, under mostly VFR conditions. The IFR approach through the thin marine layer at Brown field was anti-climactic even with the failed AI, after what we had been through.
The next day, examining the aircraft, all was fine except for the broken AI, and the paint on the leading edges of the wing in about a 1 inch wide stripe, was stripped to shiny aluminum. The rest of the plane was astonishingly clean, however.
Looking back, I can't believe I flew that IFR trip without onboard radar! In retrospect, on the plus side, I learned my training was good; it all worked for me that night. My judgement? In hindsight I would have picked up a motel room and left the next morning at sunrise under dewy clean sunlit morning skies.
The best advice I can offer: don't fly into embedded T-cells, period, even if you think they won't be a factor. The second best advice? If you do, just fly the attitude. Focus on keeping the wings level and the airspeed within reason and if you take care of these two issues, you'll stand a chance.
I know this sounds like a tall story, but somewhere out there, perhaps reading this and remembering, are a programmer who will never forget how nature displayed her use of charged electric particles, and a controller who probably still feels good about being able to help out a pilot just trying to fly home.
Onward & Upward! ~ rfb
Posted by
Rob Bremmer
at
1/30/2007 08:16:00 PM
0
comments
Labels: Hail, IFR, LOGBLOG - Christmas day flight, night flight, thunderstorm clouds, turbulence AI
Saturday, January 13, 2007
REVIEW - Catalina Island, Excitement off the Southern California Coast

REVIEW
'Catalina Island is the place to be', as the old song says. Fun for pilots, fun for passengers, for a day, a hike, a swim, or an overnight adventure in Avalon.
Living in Southern California, Catalina was one of my favorite destinations. Once owned by Mr. Wrigley, of chewing gum fame, the airport was a private strip created by flattening the top of a mountain. Now it is a paved strip with an attendant, unicom, a restaurant and transportation into the town of Avalon down by the sea, and open to all.
Pilot challenges abound. First, you have to decide what altitude to use, which is dependant on whether you angle out to sea from the south coast or from the north prior to reaching the Los Angeles area, or choose instead to fly lower with less water to cross but having to communicate with LAX controlled airspace and watching out for large volumes of traffic coming from every direction.
It's a right-hand pattern when the typical runway 22 is used as the winds are blowing from the west, but here's where the real fun begins. The airport is at the top of a mountain, and on all sides terrain rapidly falls away towards the sea. Your turn to base and final are out over the ocean, over a thousand feet higher from a ground reference than you are used to at that point. It feels like making a turn in space, but remember, you are working not off sea level below you but the top of the mountain, which you are turning back to meet. This makes judging pattern and altitude tricky, yet it can be accomplished best by keeping a close watch on your altimeter and the VASI on final. The fun is not over yet, though. The wind blowing over the top of the mountain often creates strong laminar flow with a downturn - you guessed it - right before the landing touchdown zone, which means you have to be ready for a healthy addition of power on final to hold your glide path.
But wait, there is more! The runway has a slight rise, with a subtle peak in the middle. This means just as you touch down, you look down the runway and see the apparent length diminishing very rapidly. There are a LOT of brake skid marks from prior pilots who thought they were going over the edge on the far side, but just like you, they successfully crest the middle of the runway to realize they still have a half runway left. Turn off to the left, and find a parking space and register your plane inside the building.
Now the ground fun starts! For lunch, have a buffalo burger, at the restaurant with a spectacular view out to sea. The buffalo are from the island. They are rumored left over from a movie shoot early last century and are regularly harvested and served. I found it better than any hamburger I've had before.
You can sign up for a ride down the bumpy hill to the town of Avalon, which in all ways is a sleepy beach town with a great history. Visit the beautiful casino building at the end of the promenade. Tour the Wrigley mansion. Skin dive or S.C.U.B.A. dive and swim with orange Garibaldi, the California state fish; among one of many species you will see. Get a room for the night or a weekend. Rent a boat. Swim, or hike to the other side of the island on a week-long backpacking trip.
When you are ready to leave, there is one last treat the island airport offers. As you take off, when you would be typically 200 feet above the ground, the end of the runway drops away over a cliff and the zoom effect is stunning, you feel for all the world like you are in a rocket climbing to space.
I've flown many aircraft to Catalina; a Kachina Varga, Aeronca 11AC, Stinson Voyager, many Cessna's and Pipers, and a Cessna 320. The fun never ended and each aircraft allowed me an opportunity to explore the challenges - and rewards - one more time. Someone once flew a glider from the mainland, with photos on the walls to prove it, however they did need a tow back to the mainland.
Here are a few useful links:
http://www.catalina.com/airport.html - About getting to Catalina Island and contact information.
http://airports.pilotage.com/avx/ - Specific airport info with a good aerial photo of the airport.
http://www.micheloud.com/FXM/Flying/Catalina.htm - An interesting site with many images and tips.
http://www.catalinachamber.com/ - Chamber of Commerce, official Catalina Island website.
This is one destination worth traveling to as you head up or down the coast, or as an end destination unto itself. Enjoy your flight!
Onward & Upward! ~ rfb
(the image shown is a computer generated image in Microsoft Flight Simulator accurately reflecting the approach to Runway 22 at Catalina. I applied digital filters to the image to make it more artistic and interesting).
Posted by
Rob Bremmer
at
1/13/2007 11:53:00 PM
0
comments
Labels: a fun place to fly and travel, Catalina Island, off the Southern California coast., REVIEW - Destinations
Tuesday, January 9, 2007
FLYOSOPHY - Discussion Forum: 'Significant Others' & More Fun Flying
FLYOSOPHY - Flying, as in most other activities, can be more fun when shared with someone you care about. Does your significant other share your feelings for flight? If not, is there anything you can do to increase their participation?
Why don't wives and girlfriends like to fly as much as the men? It is undisputably true, most flights in GA aircraft are made by guys, either on their own or with a few friends. When I was a Chief Instructor and hundred's of students showed up to learn to fly, guess what? Mostly guys. Why is that? Do they not have as much fun flying? Is it because they are brought up differently? I have a son and a daughter and I must admit, despite all attempts at equality in exposure, education, and the types of toys we allowed, my daughter increasingly gravitates towards experiental drawing, role play games and reading, my son increasingly gravitates to understanding how things physically work. He would far rather play with a toy he can take apart and reassemble, or help me with tools in the garage, or sword play with plastic light sabers.
In a nutshell, my son clearly prefers to play and experiment with how physical objects are made and how they move about in the world, While my daughter displays a desire to explore the social interactions of objects, real or imagined, in her play. Are these universal truths? Are we simply hard-wired this way?
When my daughter was two, I began giving her toy airplanes. My own social experiment. She enjoyed playing with them, but at age 4 asked me why I liked them so much and shortly thereafter dropped airplanes for cats. No explanation. It was a hard-wired and to me, inexplicable, preference.
In college, flying girls to lunch or a trip to an exotic island or mountain location was always a good show-stopper, but they always preferred looking out the window to actually touching the controls. My wife, who once worked for the NAA and on her first day on the job was in the back of a chase plane with a clipboard and stopwatch timing a time-to-climb record attempt is a rare exception to this trend and I was lucky to find her. But even she, when it comes to touching the controls, would prefer 'getting there' over 'doing it.' I must admit this is a surprise to me, as she enjoys driving a stickshift car and is an excellent driver who likes to drive. Why not fly?
- Is it a difference in our brains? Do we have different hardwired predispositions about flight?
- Is it cultural? Does our society set us up in ways that it's difficult to change?
- Is it how the money is spent?
- Is it a fear that we don't get; a fear of not being able to do it?
I'm not creating or supporting a sterotype; far from it. I am completely aware there are many women pilots, fighter pilots, aerobatic pilots and commercial airline pilots and flight instructors. What I want to know however, is why don't they match the population demographic? Why isn't the ratio of male:female pilots the same or even close to the same as the distribution of male:female individuals?
Let's hear some thoughts and experiences, ideas, solutions and frustrations on this topic. Please add your comments to this post.
Onward & Upward! ~ rfb
Posted by
Rob Bremmer
at
1/09/2007 09:46:00 AM
2
comments
Labels: FLYOSOPHY - Discussion Forum: Sginificant others and flight, why not as many women pilots as male pilots?
Sunday, January 7, 2007
Mentor - Flight & Photography: 4 of 4, Photo art at Airports


Mentor
Walking out to an airport can yield interesting aviation photography. Close shots, strong color contrasts and unusual patterns, especially when edited into digital art, can create striking works of art.
The airplane is a dramatic form itself. Knowing that, interesting patterns can be uncovered in everyday airport scenes and at community airshows.
The formation flying image captured my eye in the three strong colors in the gold, white and blue, and the strong horizon line in contrast to the curved flight of the aerobatic team.
The Travel Air is a beautiful aircraft under any condition. This one was meticulously restored and looked good at an angle capturing the whole craft and in a close up on the amazing structure of the rotary engine.
The Virgin Atlantic jet was on the ramp next to my jetliner at Dulles, waiting for a thunderstorm to clear the area. I was struck by the intensity and color in the dying thunderstorm behind the jet, as well as the strong angular line of the clouds jutting down to the airliner, reminiscent of an additional vertical fin.
Onward & Upward! ~ rfb
airport
Posted by
Rob Bremmer
at
1/07/2007 12:35:00 AM
0
comments
Saturday, January 6, 2007
Mentor - Flight & Photography: 3 of 4, Photos from a Jet Airliner window


Mentor
The Aerial photos from a jetliner are fun, and with digital photography and editing, can create amazing art and photos.
For starters, you don't have to worry about any FAA regulations. But you do need to secure a window seat and not over the wing. In front of the wing is best as you won't pick up distorted air imagery from thrust gasses exiting under-slung engine pods. Try to pick a clean window, for obvious reasons.
When shooting from an airliner window, glare is your enemy. Here are a few tips: Wear a dark shirt, as lighter colors reflect back onto the plexiglass and alter your photo. Nothing worse than a ghostly shirt button floating in the middle of your photo! Also, be aware of sunlight slanting into the plane through the window. Avoid it if you can, but if you cant, increase the angle between your camera lens and the angle of entry of the sunlight for best results. Go crazy on the shutter, and experiment with different angles.
Back on the ground, you'll be glad for all the images you shot as not all will be usable. For the ones that are, you want to minimize the effects of the airliner window. Sharpen the image as best you can, and increase brightness and contrast, playing with the balances. Reflections can sometimes be eliminated by selectively altering contrast and brightness for specific large areas of the image.
All of the photos shown here were taken from an airliner departing from or arriving into the Pacific Northwest. Whenever I could I took shots of Mt. Hood, and was rewarded by capturing the seasonal changes on the mountain over the course of a year. Looking at a glacier carved river valley from the Flight Levels gives new perspective to the awesome ancient power of flowing ice which can carve out valleys and leave a smooth sculpted curve pathway that lasts forever.
Don't be afraid to include the wing, sometimes it increases the effect, as with these unusual cloud rows of The Northwest Bitteroot Mountains.
Onward & Upward! ~ rfb
Posted by
Rob Bremmer
at
1/06/2007 11:33:00 PM
1 comments
Mentor - Flight & Photography: 2 of 4, Urban and Scenic Aerial photos


Mentor
The two most common types of aerial photographs are urban and of structures or scenic. Start with scenic first, then move on to buildings and cityscapes
Aerial photography in a scenic environment is a good way to start . You will be using wide angles, so you'll pick up less vibration. There will be less traffic (but still have a friend help with another pair of eyes), less radio traffic to monitor, and most likely no need to make preflight arrangements with a controlling entity for airspace access or to contact and communicate with a controller during your photo shoot. Also, you will not need to make tight circles, and can spend more time composing and planning your imagery.
When I shoot structures or cityscapes I begin by telling the FSS about my flight plans as they may be aware of any restrictions since aerial photography is different from destination-oriented flights. I plan out my altitudes carefully and while flying I always note at least two places to put the plane anywhere in the vicinity of the photoshoot. If there is any controlled airspace, contact them before entering their area with your request.
A typical controlled airspace call might sound like this: "XYZ control, Cessna ABC, 10 miles south, would like to enter your airspace at 2,000 feet and conduct aerial photography in a three mile radius centered around the downtown core, for the next 15 minutes." A typical response would be "Roger Cessna ABC, request approved, squawk 1234, and advise when ready to leave the area." Then you monitor the control frequency while you set up and conduct the shoot.
Plan your shoot before the flight, and if you have access to it, I find it useful to pre-fly the flight in Microsoft simulator, which helps develop a sense for the area and what you may experience during the shoot.
Onward & Upward! ~ rfb
Posted by
Rob Bremmer
at
1/06/2007 10:53:00 PM
2
comments
Labels: Mentor - aerial photography, mt hood, mt. st. helens, portland downtonw
Mentor - Flight & Photography: 1 of 4, Technique & Art
Mentor
Any pilot can create aerial photographs. Aerial photography does not require expensive equipment or owning an aircraft, though either can be helpful. Here are a few tips and examples.
Mention 'aerial photography' and most people think of satellite type imagery, razor clear, shot at noon to minimize shadows and usually from directly overhead. Typically this is used by government agencies, land-use groups, engineers, contractors, and sometimes for art. It is accomplished with high performance aircraft, often twin engine, and expensive belly-mounted cameras. Yet a handheld digital camera and a rental Cessna can also accomplish amazing and rewarding results. Here are some specific considerations, in the order I think are most important:
1.
Plan the flight for safety first. How low can you legally go over the ground? If it is an urban area, you may need to use a strong telephoto lens, 180mm or more, to compensate for the extra altitude required above the ground. You may need to be in communication with any nearby controlled airspace. You will need someone to help keep an eye out for traffic or share flight and photographer responsibilities, and you need to discuss strategy before the fight; who does what, and when? How long for the shoot? Plan for safety first, all else comes later.
2.
Plan for camera angle and 'window shooting angle.' High wings seem best, but lowered wings can block angles and gear and struts can block views. Sometimes Low wing aircraft with small vent windows can work well - remember, the camera lens is small; you only a small opening for a clear air shot. Know your aircraft well enough to know where the best angle occurs, and practice putting objects in that view. Sometimes that requires a turn. I remember successful shoots from a Diamond Katana where the camera went out the plexi vent window, and the plane was banked about 20 degrees wing down, providing an arc around a medium distance ground target and offering an unobstructed view of the photo-target. If you don't like the angle, get closer or farther away, or higher or lower; always mindful of safety of course. Don't worry about looking through the viewfinder, I find it seldom matters. Practice locating the object you want to shoot in the best 'shoot window' for your aircraft and point your camera straight through that opening, and concentrate on flying while clicking away. You can edit and compose later.
3.
Plan for the light. Cloudy days are good if you want to eliminate shadows. Sunny days can be good if you want dramatic lighting effects which occur with low sun angles in morning and evening, and strong yellow orange light as the suns rays go through the longer section of atmosphere before striking the ground. Mid-day sun is good for strong colors and minimized shadows. Don't worry if you have to shoot through plexi glass, you can use digital editing available on most mid-level editing programs to edit out effects from Plexiglas. Shoot with the sun behind you or up to 90 degrees from behind you. Shooting towards the sun creates silhouettes and usually poor imagery.
4.
Plan for emotion. You see with your eye a special scene. It moves you. You shoot it with your camera, and later you realize it is a bad photograph, cluttered, or otherwise un-dramatic. Why? This is because your emotions are triggered by the image but the camera does not capture emotion. So you have to be willing to edit out power lines, etc, later, or plan for dramatic low level light , or practice placing the object in the viewfinder in a unique way. Cameras do not capture feeling, only light. Think about how to convey feeling and meaning.
5.
Plan for vibration. Shoot at shutter speeds of 1/1000 sec or higher. I've had success down to 1/125th of a second, but at that speed it is hard. Wide angle lenses pick up the least motion blue, telephotos the most. and touching any part of the camera to any part of the aircraft during the shoot guarantees engine vibration will alter your image. When my primary responsibility is photographer in the aircraft, I often make a crook of one arm, bracing that had on my shoulder, and resting my camera hand on this vibration absorbing brace, or if the shutter speed is high enough, I just make sure the lens and camera are as far from vibration sources as possible.
6.
Type of camera. I've used many different types. I've been happiest with two, a Canon Powershot for simple scenics and when I travel, and a larger professional Nikon with interchangeable lens ranging from 18mm to 300mm.
7.
Editing is key. Slide film is go,d I used Kodachrome 64 ASA for years, but despite it's brilliant color saturation and detail, digital is getting good enough to be the best thing going. With digital you want the largest screen size, finest resolution and as many megapixels as you can afford. The ones you see in this blog were mostly taken with 4 megapixels so judge accordingly. More sophisticated editing programs are available, but Microsoft Digital Editing Suite does a nice job for the cost. Experiment with contrast, saturation and many other digital editing techniques until you find the photo pleasing or until you decide to use filters to turn it into your own unique digital art. Remember to always save a file copy before beginning your edits, just in case!
Bottom line - get a friend, get a plane, get a camera and go give it a try!
Onward & Upward! ~ rfb
Posted by
Rob Bremmer
at
1/06/2007 10:29:00 AM
1 comments
Labels: 1 of 4, Mentor - aerial photography, photographic methods, technique
Sunday, December 31, 2006
REVIEW - Sunriver Oregon: 2 of 2, Summer
REVIEW
Sunriver Oregon offers summer fun in golfing, tennis, swimming, paddling canoes, fishing, biking and more. And of course there is a good airport in the middle of it all. But mother nature often provides the best entertainment with astonishing cloud displays, especially when a thunderstorm occurs near sunset.
For several summers now I've spent time with family enjoying the natural beauty of the high desert around Sunriver and the activities available within the resort area. The entire family enjoys swimming and it's a perfect place for the kids to learn to ride a bike, with paved trails separate from streets with cars.
As a pilot, I love open space and good views of the sky and Sunriver has that and more. There is an observatory on site, staffed by volunteers, where you can spend time learning about the night time universe, but I find the most spectacular and awe inspiring moments in nature can occur as the sun is near setting and a thunderstorm is breaking up. In Sunriver, this seems to happen at least once a summer and the colors and shapes can be unforgettable.
THis URL gives you specific airport information including a live airport webcam: http://www.sunriver-resort.com/sunriver-airport.php
Onward & Upward! ~ rfb
Posted by
Rob Bremmer
at
12/31/2006 05:24:00 AM
2
comments
Labels: biking, family, live airport webcam Review - Sunriver 2 of 2, natural beauty, thunderstorm clouds
Thursday, December 28, 2006
MENTOR - Use your 'Visual Yardstick' to judge Distance-to-Clouds

Mentor
Learning to judge distances from clouds can be hard in the beginning of your flight career. Here are three techniques for developing your own 'Visual Yardstick.'
If you know your altitude above the ground, or the length of a nearby runway you see on the ground, or the height of a mountain ridge or tower that rises at least 1,000 feet above the surrounding terrain, you can use any of the three to develop your own 'visual yardstick.'
The key is using visualization, which gets better as you practice. Say you are 2,000 feet above the ground. Look at that distance. envision a red hot laser beam, straight down, or a huge yardstick. Next, mentally tip that yardstick up 90 degrees and swing it around. Would it reach that nearby cloud? Would it reach through or fall short? It may help to envision a square, with the distance down being one defining leg and the horizontal distance being another. You know the difference between a rectangle and a square. Do the two envisioned legs between you, the cloud and the ground form two sides of a rectangle or a square? This is a very useful way to judge cloud distance.
Another way is using the length of a runway you see on the ground. Let's say you can see a runway your chart says is approximately 4,000 feet long. Imagine the Jolly Green Giant coming along and picking up the runway. How many of those runways would fit between you and the cloud? 2 runways would be 8,000 feet. Half a runway would be 2,000 feet. See how it works?
Another way to develop a visual yardstick is with a tower or a ridge that is a known height above the surrounding terrain. On a close scale, you can use the size of your own aircraft. It is likely the wingspan of your aircraft is around 3o feet. Suppose it is 32 feet from tip to tip. Three of your aircraft flying wing to wing in tight formation would be 100 feet. If you are this close to a cloud in VFR conditions, you'd better be taking steps to get farther away!
The point to all of this is that you can use known object sizes in your visual field of view to estimate distances to other objects. Any visual skills you can develop will help improve your technique and this one is tried and true by many pilots over many years.
Onward & Upward! ~ rfb
Posted by
Rob Bremmer
at
12/28/2006 11:16:00 AM
1 comments
Wednesday, December 27, 2006
FLYOSOPHY - Glider Pilot's Fervant Wish Taking Off on Tow

FLYOSOPHY - Most often all goes well, on tow. A smooth and serene ride to the release point. Still, it's a thin filament line between success and early release...
But if it must
May it not be too low
Or too slow
But make it high
And if high make it clean
Separating machines
With room to soar
And time for more
And look over the
Tow pilot too.
Posted by
Rob Bremmer
at
12/27/2006 12:15:00 AM
1 comments